Assign keys to different fingers

Assigning keys to different fingers will save you so much time since you won’t be moving your hand too much around the keyboard and the keys will always be easy to reach.
Place your left hand over the keys A, S, D, and F.
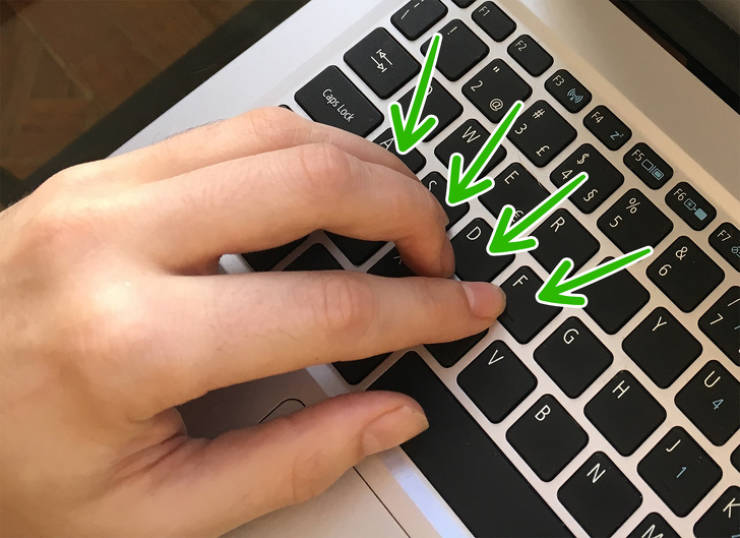
This will help you reach the keys on the left side of the keyboard easily without moving your hand too much.
Place your right hand over the keys J, K, L, and ;.
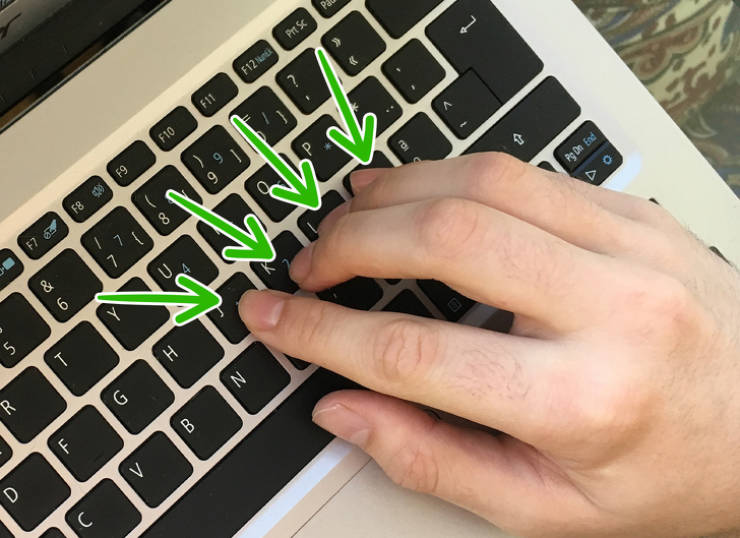
This will help you reach the keys on the right side of the keyboard easily without moving your hand too much.
Use all 10 fingers.

Using all 10 fingers will allow you to type faster, since you will be able to keep your palms in the same position and only move your fingers.
Slide your fingers across the keyboard.
Sliding your fingers across the keyboard, instead of lifting them to reach the keys, will help you finish your sentences quicker.
Use your thumbs to press the space bar.
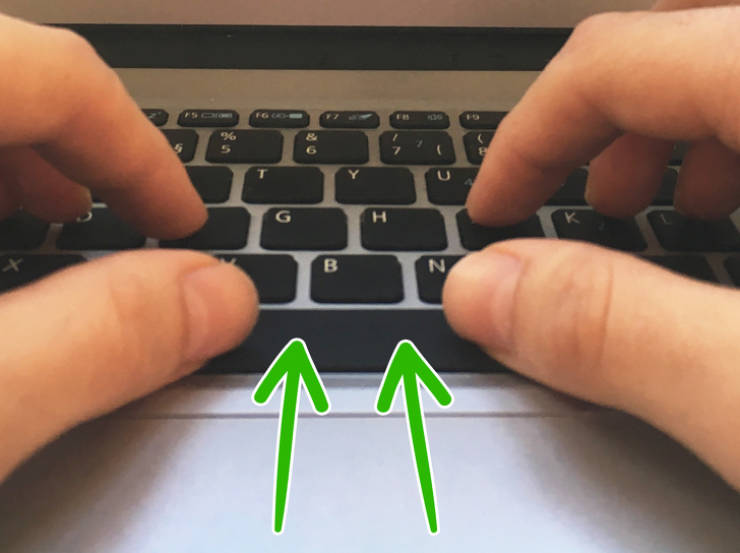
Thumbs should only be used on the space bar and should always be on top of it, so you are always ready to use it.
Use a color coded keyboard
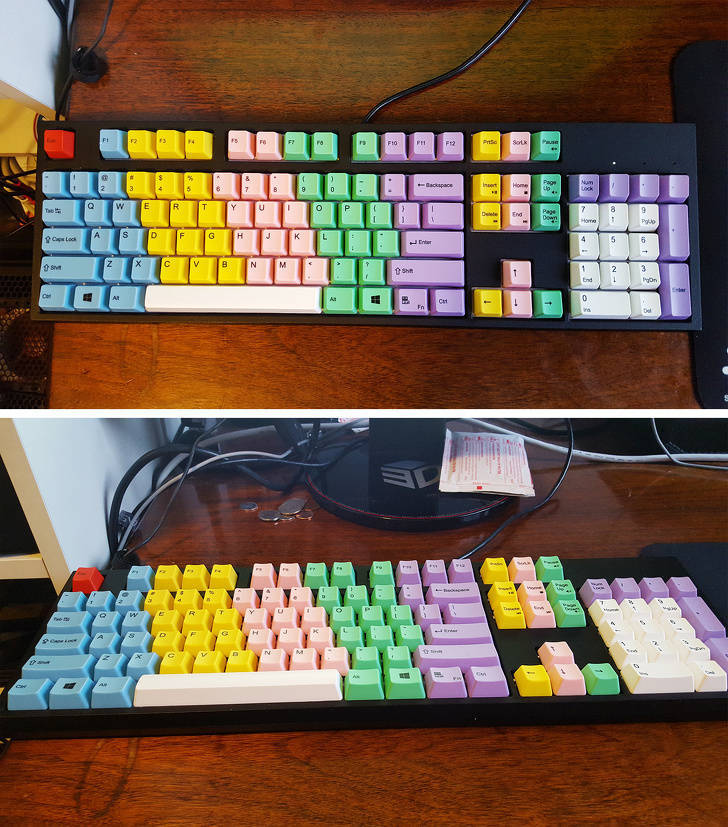
A color-coded keyboard will help you move your fingers around the keyboard and easily realize which section should belong to which finger.
Try to not look at the keys, to train your muscle memory.
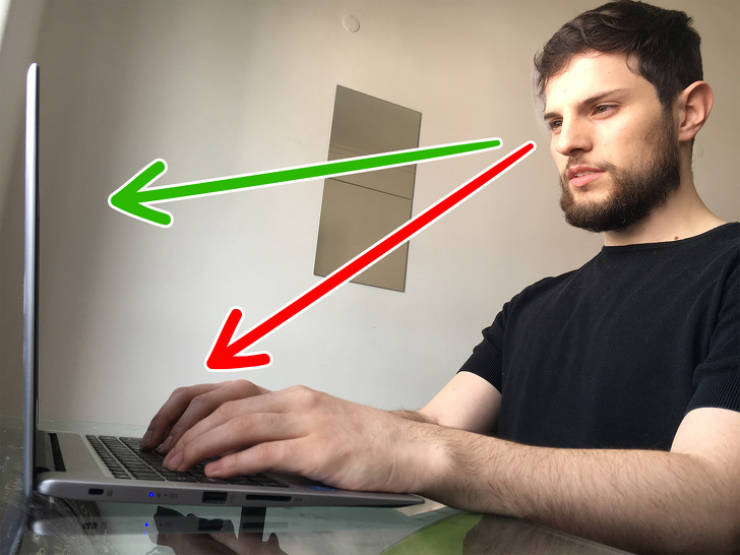
By not looking at the keyboard when typing, you will help your brain learn where the keys are placed without looking at them, this will save you a lot of time.
Learn the keyboard shortcuts.
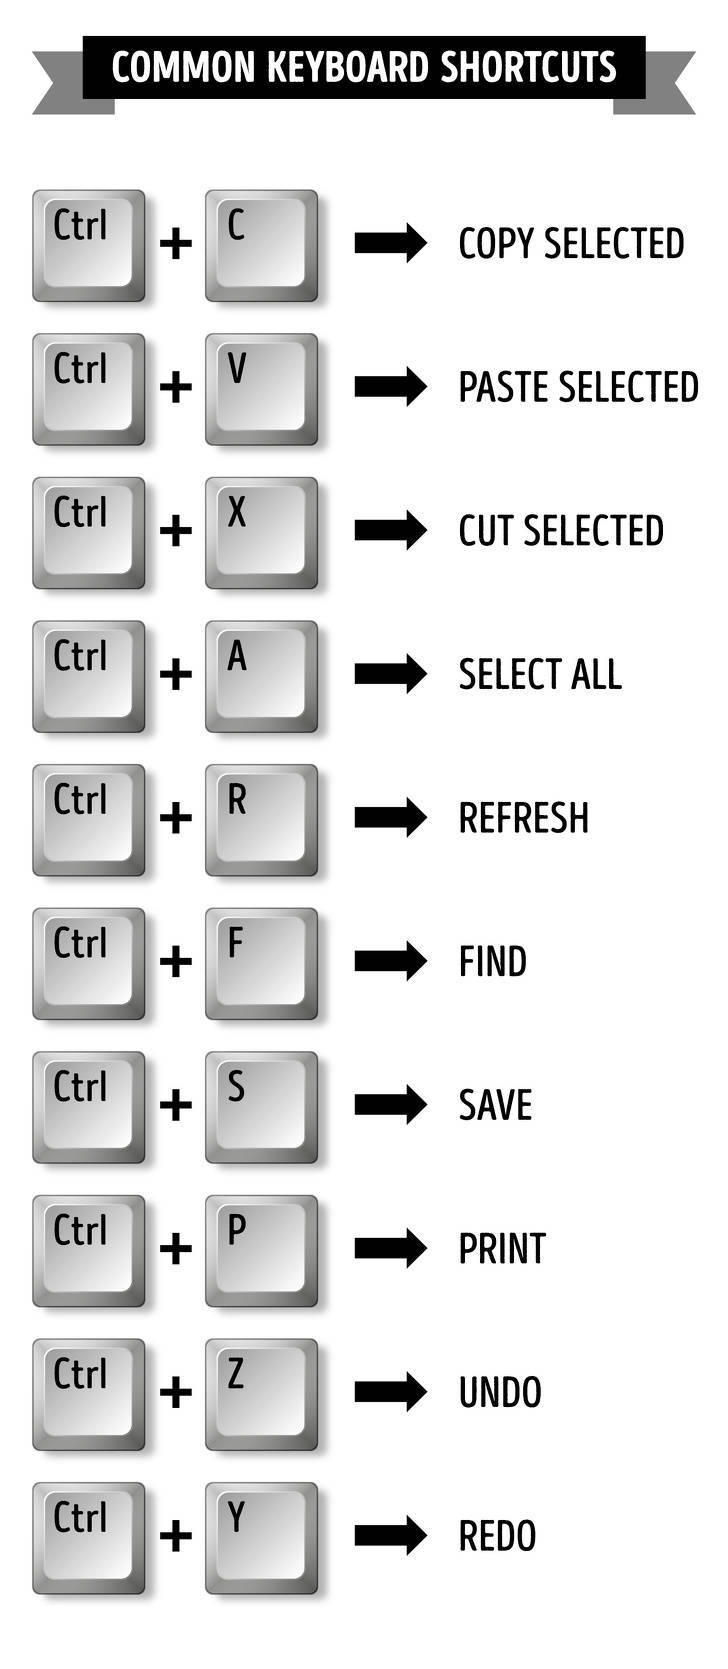
Learning shortcuts will save you time since you will only need the keyboard to do them, without the use of a mouse.
Keep a 45-70 cm (18-28 in) distance between your eyes and the screen.
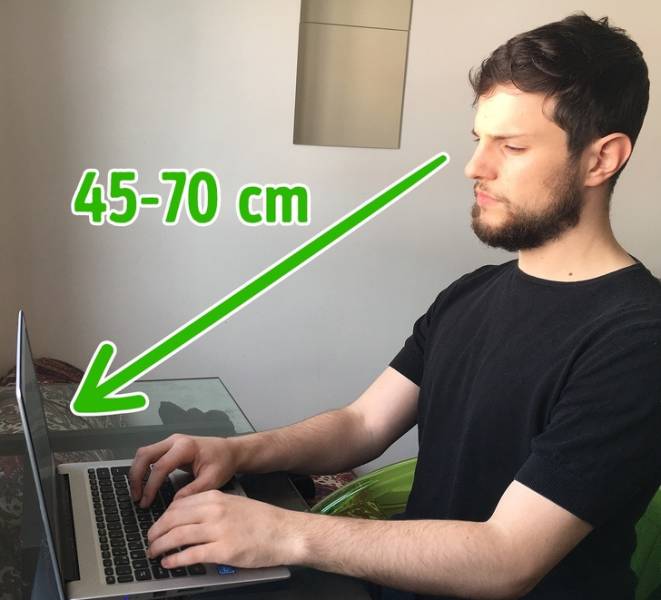
This distance will allow you to have a wider view of everything that is happening in front of you. You will be able to see the screen and where your hands are placed around the keyboard.
Write the assigned keys on the backs of your fingers.
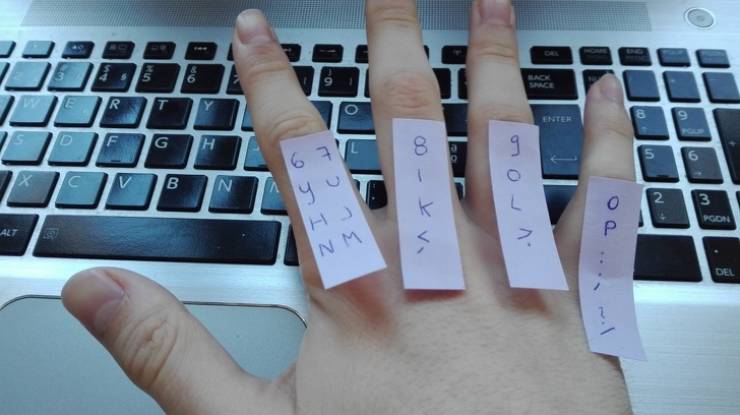
If you don’t have a colored keyboard and in case you keep forgetting which keys should be used by which fingers, you could always write the corresponding keys on the backs of your fingers.
 Barnorama All Fun In The Barn